After Apple pushed out AirDrop this new feature, many people are curious about it. You may ask What is AirDrop and how to use it in the Apple ecosystem. Do not worry about that, this post will give you a detailed answer about this new file transfer technology and how to use it. You will never be worried about how to turn on AirDrop and how to receive and accept AirDrop ever again after reading this article.
Part 1. What is AirDrop
Part 2. How to Turn on AirDrop
Part 3. How to Receive and Accept AirDrop
Part 4. FAQs about Airdrop
Part 1. What is AirDrop
Some Apple users may hear of it, but they still want to know what is AirDrop. In general, AirDrop is a feature that allows iOS devices and Mac devices to wireless transfer all kinds of files to each other. It uses Bluetooth to transfer files, so you don’t have to connect to the internet or insert a USB cable. You have to make sure that the Wi-Fi function of the devices is turned on, although you do not need to connect with Wi-Fi.
This feature will also reduce your concern for safety. In the transfer process, there will be a firewall built around the connection of the device. And all files will be encrypted during this process, you do not have to worry that your files will be hacked or other internet attacks.
Part 2. How to Turn on AirDrop
After finishing talking about what AirDrop is, now you will read how to turn on AirDrop on your Apple devices to transfer files with each other.
The first thing is to turn on your AirDrop. On iPhone, tap AirDrop from General on the Setting app. As for Mac, click the AirDrop button from the Go menu which is on the Finder app.
And then you can transfer the files. If you want to transfer files between iPhones, it is very easy to do it. You just need to close two phones and then you can transfer files. But there is a slight difference between the iPhone and Mac. Do not worry, there are two parts that will introduce to you specifically how to do that.
1. How to AirDrop from iPhone to Mac
Here are the detailed steps on how to AirDrop from iPhone to Mac:
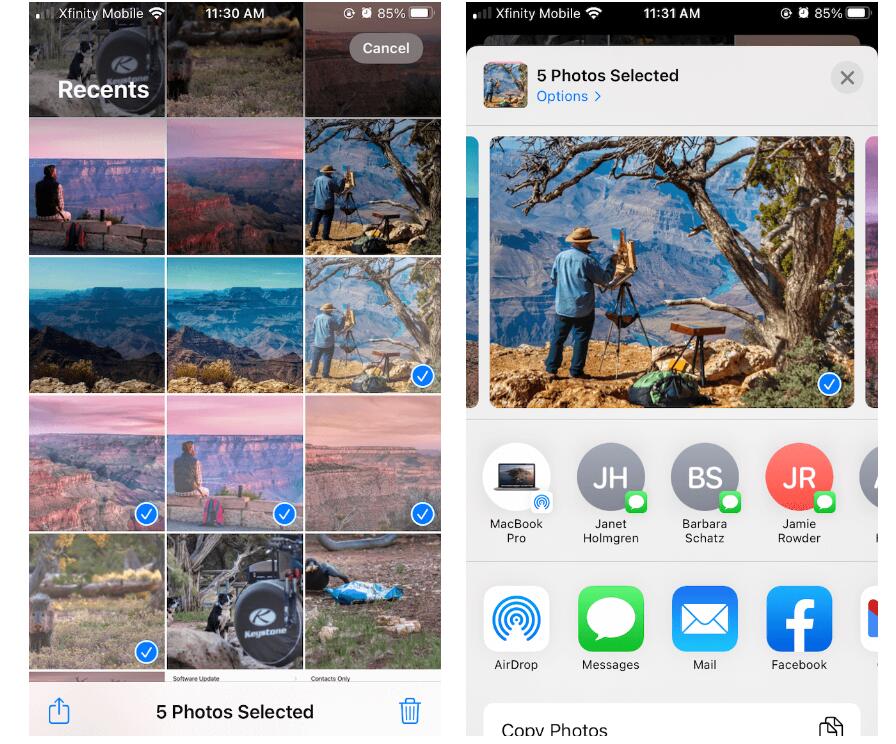
Step 1: Find the file you want to send, you can almost send any file such as photos, videos, even notes, and so on.
Step 2: When you locate the file you want to send, tap Share, and you will find the Mac device’s name on the share list.
Step 3: Tap the Mac device that you want to transfer files, and you will see a notice that says Sent after completing transferring files.
Step 4: And the files are in the Mac Downloads folder.
airdrop-from-iphone-to-mac.jpg
2. How to AirDrop from Mac to iPhone
Here are the steps on how to AirDrop from Mac to iPhone:
Step 1: Click the AirDrop button on the Finder.
Step 2: And you will see the interface of AirDrop, there are devices near your Mac that will be displayed on this interface. And you can drag the files you want to send on the people’s profile photos.
Step 3: Then your files will start transferring. And you can receive the files on your iPhone.

airdrop-from-mac-to-iphone.jpg
After reading this part, you must learn how to turn on AirDrop to send files. But if the Wi-Fi feature or Bluetooth feature has some issues, then you will find the AirDrop not working. If you still want to transfer files between iPhone and Mac, you can use some third-party software like AnyMP4 iPhone Transfer Pro to transfer your files from iPhone to Mac.
This software gets recommended because it is easy to use, and you can transfer all data with a USB cable. No need for Wi-Fi or Bluetooth. What’s more, you can not only transfer files but you can also backup or restore your data with this software.
![]()
anymp4-iphone-transfer-pro.jpg
Part 3. How to Receive and Accept AirDrop
After learning how to turn on AirDrop and transfer files between iPhone and Mac, this part will teach you how to receive and accept AirDrop.
Actually, when someone sends you files by AirDrop on your Mac or iPhone, you can choose if you want to receive and accept them and then save them on your device. There is only one situation in which your devices will automatically save AirDrop files, which is your Mac and iPhone are all signing into the same Apple ID.
And here are the steps on how to receive and accept AirDrop from others
Step 1: There will be an AirDrop notification on your Mac and iPhone when someone sends your file, just click, or tap Accept from the pop-up menu.

receive-and-accept-airdrop-on-mac.jpg
Step 2: The files you accept will be saved in your Downloads folder on Mac or the relevant app you saved the file format to on your iPhone.
Part 4. FAQs about AirDrop
How to add a person to the AirDrop?
The person you want to add must use iPhone 11 or a later version. And make sure that person’s device is near your device. Then you can open an app, tap Share, and tap AirDrop. Then tap the profile picture of the person you want to add to the AirDrop at the top of the screen.
How to change your AirDrop name?
Many people thought that the name of AirDrop is the same as the device’s name, Then when they finish changing their device’s name, they found out there is no change in AirDrop’s name. Actually, AirDrop’s name is the same as the Contact’s name. You should open the Dialing app on your iPhone and tap on Contacts at the bottom, then change the name. As for Mac, you should click on the Apple icon to click the System Preferences option, then click Sharing option to change your Computer’s Name.
Conclusion:
After learning the knowledge of AirDrop, you must know what is AirDrop and how to use it. This new feature will your transfer files with convenience and safety. Now you can experience AirDrop yourself and use it to transfer your files like a piece of cake.

